Dual Booting Haiku and Windows 11
Somehow almost all of 2022 passed me by without a post, bit with the recent release of the Haiku R1/beta4 I figured it was about time that I finally worked out how to get it dual booting with Windows 11, rather than just settling for booting via USB whenever I wanted to use it.
Warning! I'm no expert on EFI booting. This is simply a writeup of how I got Windows 11 and Haiku R1/beta4 booting side by side. Use this information at your own risk! I'm also not using disk encryption in Windows and so don't have an issue with booting it with Secureboot disabled. I'd suggest reading this post on schdck's blog before continuing here. This will get you familiar with the process, though it's all a little easier from Haiku.
I've been following Haiku since it was called OpenBeOS, and have been running builds of it ever since the first demo version of the AppServer that rendered coloured rectangles in place of windows and GUI widgets, and in the early pre-EFI days I was perfectly comfortable setting up multiple operating systems. MBR partitioning and the BeOS R5 boot manager were my friends, and they were easy to use. For some years after that I was content with running Haiku in VMs on whatever laptop I had at the time, but then around 2015 I once again built a PC and had it running Windows 8. From that point on I wasn't comfortable trying to work out how to make it dual (or more) boot - I didn't want to screw up my Windows install. 7 years later, and upgrades via 10 and 11, that same Windows install is still going, but I really wanted to get Haiku booting properly too.
Side note: Booting from USB
I tend to use Balena Etcher to write the Haiku ISO files to USB drives, it's easy and works well on macOS and Windows. For whatever reason though, I've never had much luck with my current motherboard and booting Haiku from a USB drive unless I go into the UEFI setting sand make the USB drive the first boot device in the list. Simply selecting that device from the boot menu on start up isn't enough, Haiku is only happy when that device is right at the top.
Installing rEFInd
Step 1: Install Haiku
Once Haiku is booted from a USB drive you'll want to install it to your hard drive. Hopefully you've got some free space on a drive somewhere (you can shrink existing partitions in Windows), and all you need to do is partition it with the BeFS, initialize that, and then use that as the target forthe installer. On my machine it takes less than a minute. I've not gone into details here because it's quite easy to find this information on the Haiku website.
Step 2: Download rEFIind
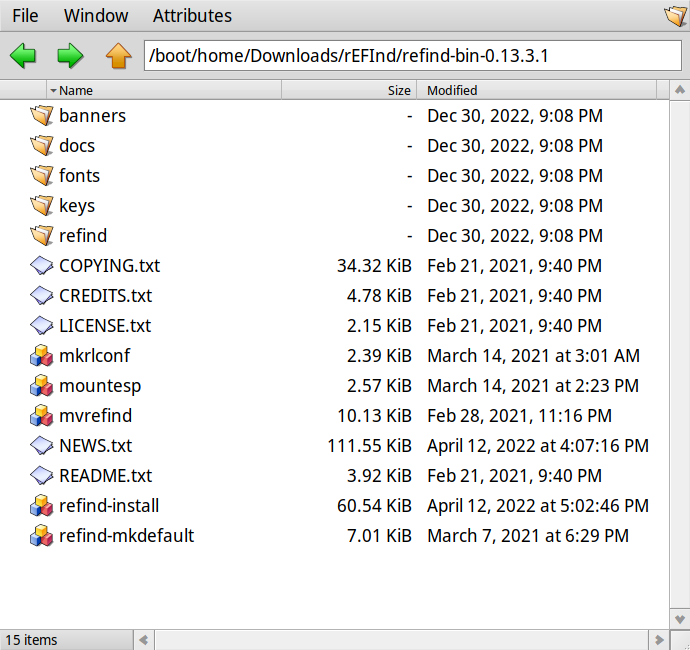
Visit the official rEFInd download page and download the "binary zip file" option. Extract the ZIP file and you should see something like the following in Tracker when you open the directory you extracted the zip into.
Step 3: Install rEFInd
Installing rEFInd really just requires you to copy the correct files for your architecture from the extracted directory to your system's EFI partition. Chances are if you're on a modern PC you'll want o use the x64 files, though rEFInd also provide binaries for 32 bit systems and 64 bit ARM machines. But before we copy those files, we'll make a few other changes to the EFI partition.
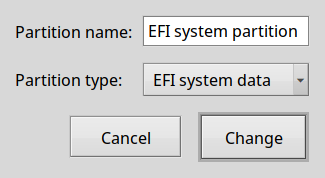
Mounting the EFI partition is easy under Haiku as it doesn't do anything to stop you from shooting yourself in the foot. Doing it from Windows and elsewhere is rather more complicated. You might want to use DriveSetup to help you identify the correct partition, it'll likely be at the start of a disk, around 100MB in size, and formatted as FAT 32. Right clicking on a partition in DriveSetup and choosing "Change Parameters" will pop up a dialog showing the partition type, and you can use this to confirm that the type of the partition is "EFI system data". Obviously close that without making any changes.
Once you've identified the partition you'll want to right-click on the desktop, navigate to Mount in the menu and then click on the partition. Mount it Read/Write or you won't be able to make changes. Once you open this partition in Tracker you should see a directory called EFI, and under that (assuming you have Windows installed) one called Microsoft.
Create a directory along side the Microsoft one called HAIKU, and copy the Haiku EFI bootloader from /boot/system/data/platform_loaders/haiku_loader.efi into it. I renamed mine to BOOTX64.EFI because at some point I thought that was required. As of now I'm not so sure, but it doesn't hurt at any rate.
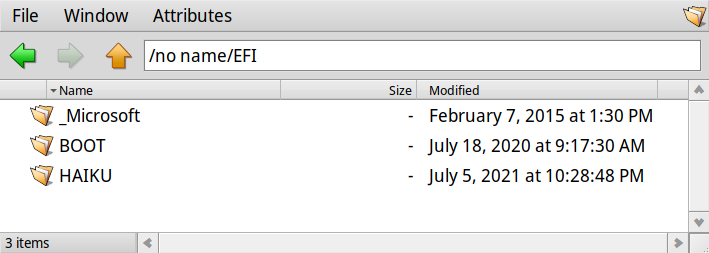
Go back up a level and rename the Microsoft directory to something else - I simply prefixed it with an underscore. This change is because the path to Microsoft's loader is a standard one that a lot of machines will look for before anything else.
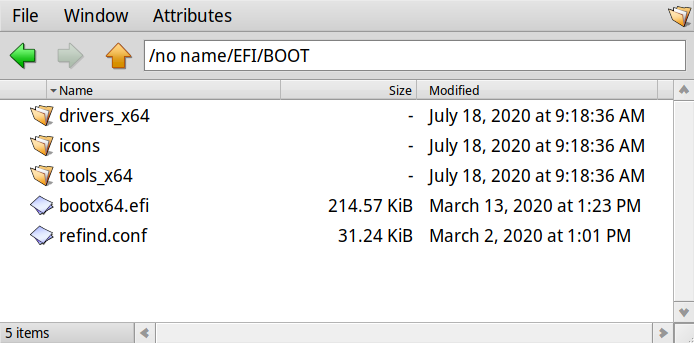
Finally, create a third directory called BOOT - this is where you need to copy the relevant rEFInd files, and the directory will look something like this:
With the parent EFI directory looking like this:
I was following an older blog post about installing rEFInd from Windows 10, and that included making a modification to the
refind.conffile - adding an entry for Windows that looked like this:menuentry "Windows" { loader \EFI\_Microsoft\boot\bootmgfw.efi icon \EFI\BOOT\icons\os_win.png }I did this, but it appears this step is actually necessary with new versions of rEFInd as it searches for known bootloaders, and I when I rebooted with this in the config file I got two entries for Windows. I since removed it, and the remaining icon for Windows boots just fine.
The last thing you might want to do is edit /EFI/BOOT/refind.conf on the EFI partition and look at some of the options in there. You can change the timeout etc. for different options though I left it as-is.
Profit?
At this point you should be able to reboot your machine and find yourself looking at the rEFInd menu, with one option for Haiku and another for Windows, hopefully with you being able to boot each of them.