Atari 1040 STF
About
I found an Atari 1040 STF listed on eBay under the descriptive title "Computer". It was cheap, looked grubby and figured it was worth buying to see if it could be cleaned up, recapped and moved on to a good home.
Updates
07/04/24
So I decided there wasn't much more to be done with this, and sold it last week after dobule checking everything with a diagnostics cart and ensuring it was functioning as expected. Quite amusingly to me, the guy who bought it confessed to already owning an Amiga, but said he's always been an Atari guy and that it's the one he has more fond memories of. He also said the only challenge would be sneaking it into the house without his wife seeing it. Hopefully it's found a good home and will bring the new owner joy.
22/04/24
Over the last couple of weeks I've managed to do a bit more with the machine, and it's almost ready to sell on. I dismantled the machine to get to the PSU and check it out - turned out to be of type ASP32 Rev 2., and while it looked quite clean, a couple of the caps were definitely doming a little, and not indented as they usually are. The machine had been working well, but it seemd like a good idea to replace them with new ones given the originals are around 35 years old at this point.
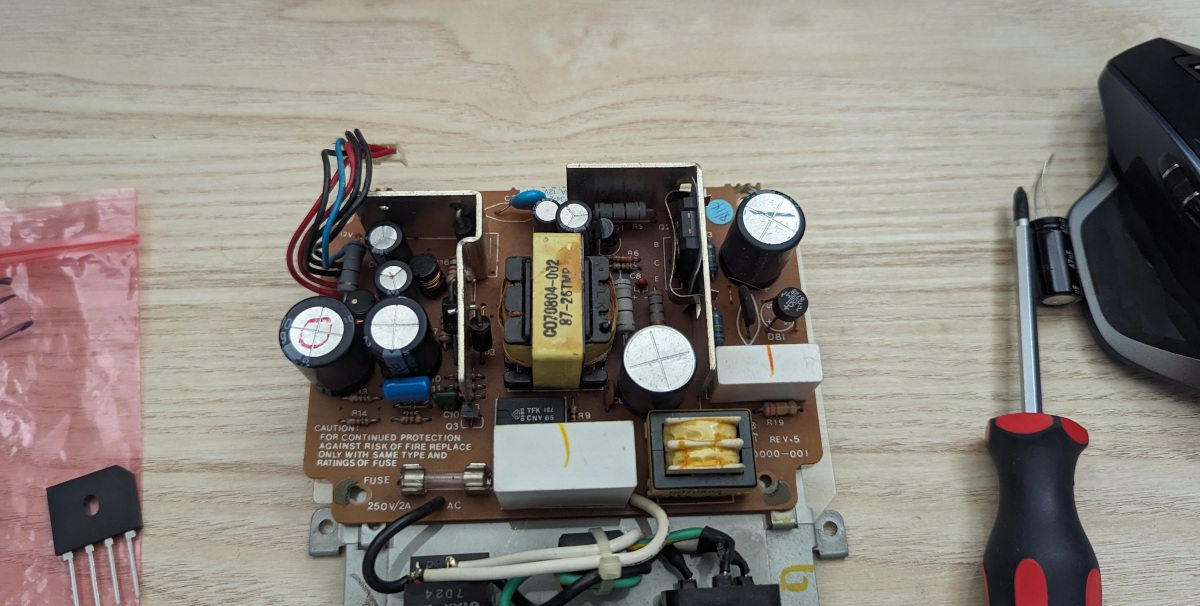
I ordered a kit from Exxos (This link will take you straight to the right part of the store page) and it arrived a couple of days later. Thankfully no drilling was required for the bridge rectifier, and everything was swapped out in around half an hour or so.

Once that was taken care of I had a look at the reset switch: it had never worked for me so I broke out the multimeter to see if it was the switch itself, and sure enough even when holding the switch in there was no beep from the continuity test. I gave it a liberal squirt of contact cleaner and then mashed the switch as many times as I could for thirty seconds or so, after that it tested ok with the multimeter, and now works as it should.
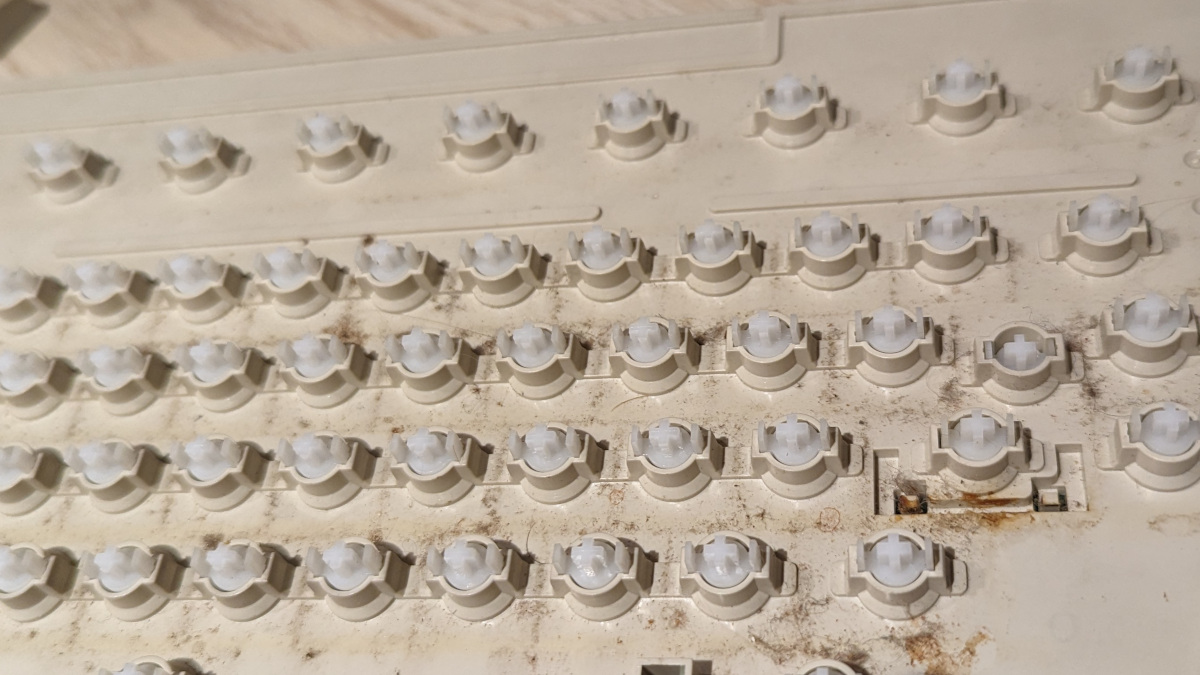
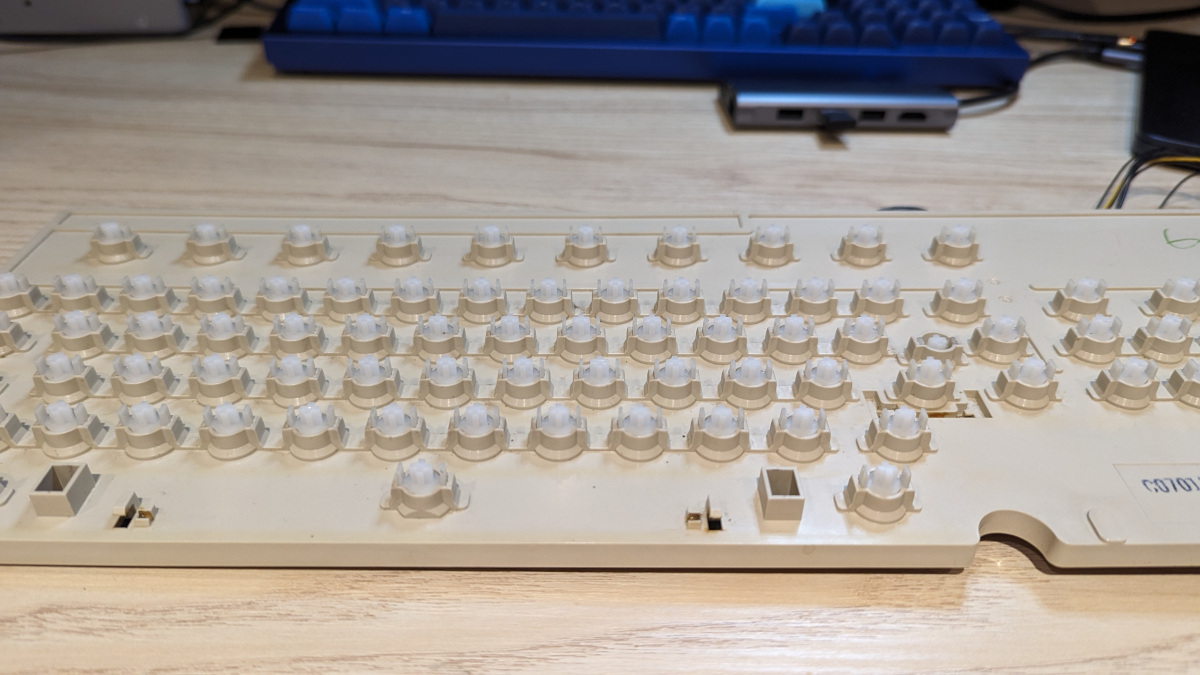
The last thing to do with the machine apart was to clean it up a little, I washed the case, removed all the key caps, washed those, and then set about cleaning the keyboard itself. It's a fair bit cleaner now.
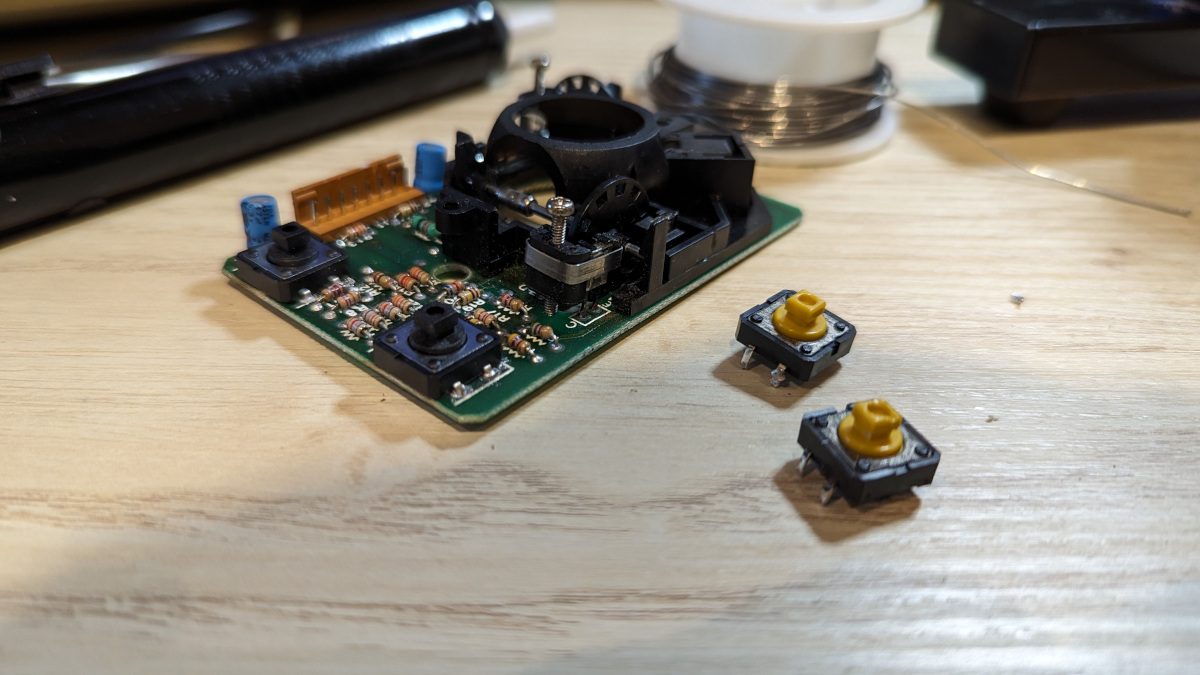
Once the machine was back together I turned my attention to the mouse (after a bit of a hunt for it). It turned out that not only was it even more yellow than the computer, but it also had a weird feeling button, and neither button seemed to register reliably. Contact cleaner made a second appearance but didn't seem to make a difference, so I rifled through the various electronic parts I have and sure enough found two buttons in an Arduino accessory kit that would work nicely. Changing these over took longer than the PSU caps, though only beacuse during removal my solder sucker caused a bit of a splat, creating a tiny solder bridge on the top of the board that I didn't spot at first; the upshot being that the right mouse button appeared to be permanently held. An inspection with a magnifying glass and a quick swipe of the iron got it sorted out.
Something I do find most amusing is the fact that at some point in it's history, somebody felt the need to write "mouse" across the back of the mouse, and did so in an ink that actually protected the plastic from yellowing. Weirdly the indented Atari logo also appears to have been spared from the effects of the yellow blight.
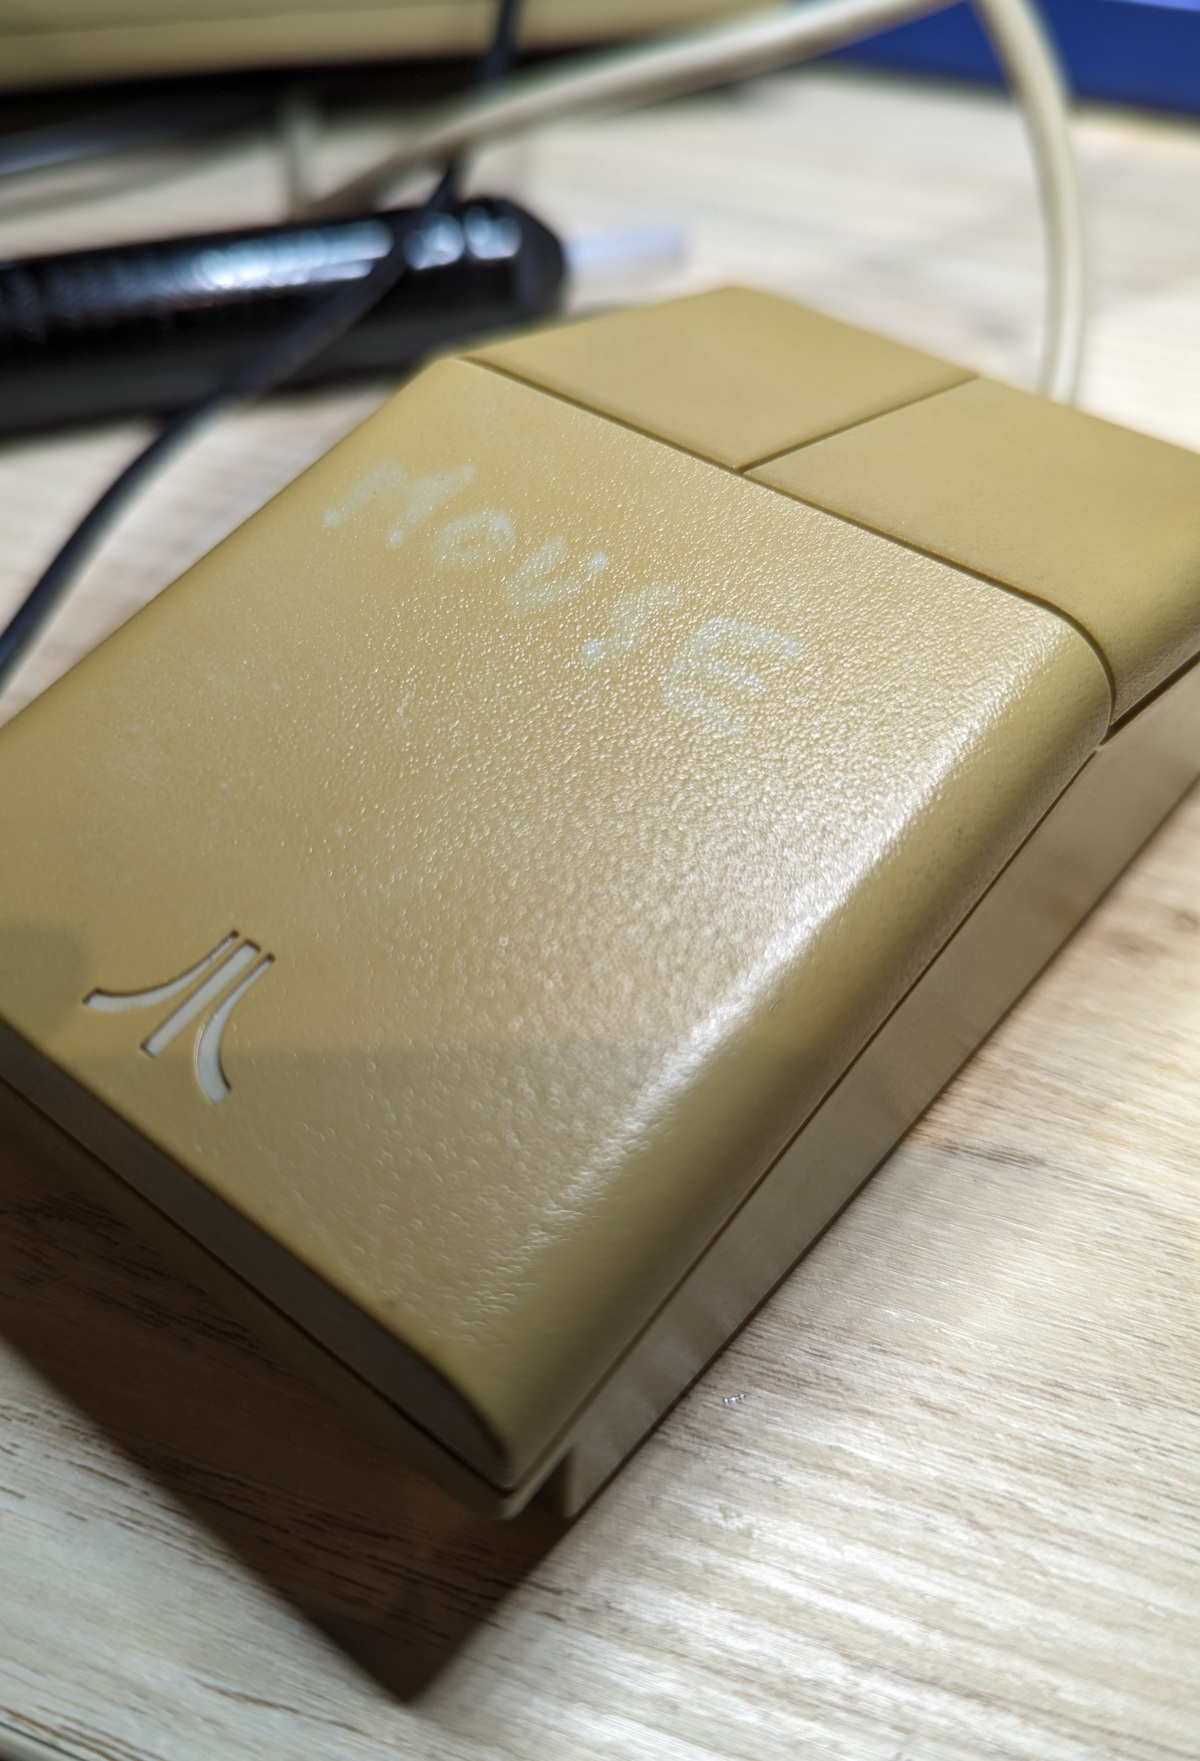
This brings me onto the final task - retr0brighting. Yes, it's a bit controversial, but seeing this STF next to my STE (which itself has yellowed a little) is really quite shocking. Whether I'll do the main unit or not remains to be seen, first I'm going to tackle the mouse as a test, using the vapour method. If that yields good results then I'll likely do the computer case too, if it doesn't... well I'll play that by ear.
24/02/24
Finally got around to finding the broken home-made RGB cable, one I made a few years back that got damaged at some point. After reconnecting a few wires to pins I tried it out and it worked first time, albeit with a tiny bit of visible ghosting. So I know now that the STF is working well, and the floppy drive seems to have camled down too and works as expected.
Next step for this machine will be to open it up and find out PSU is in there so it can be recapped using an Exxos kit, and then a good deep clean. Having had my STE on the desk for a while hooked up using composite, I had genuinely forgotten just how crips the RGB output is, and how good it looks a nice CRT.
18/07/23
Got around to digging out the ST Monitor port to VGA cable that I put together a few years ago. Plugged it in and sure enough the STF boots to the desktop fine (mono mode, I don't have a 15KHz capable monitor for Low or Medium res). The floppy drive makes some pretty horrible sounds while booting so need to verify whether or not that works. It's been replaced in the past and the case cut, if the drive has failed it'll likely make a good candidate for a floppy replacement like a Gotek or similar.

Booting from my UltraSatan works without any issue which is good, though UIPTool with the NetUSBee doesn't seem to want to transfer anythign right now despite the web UI being visible on the network ok.
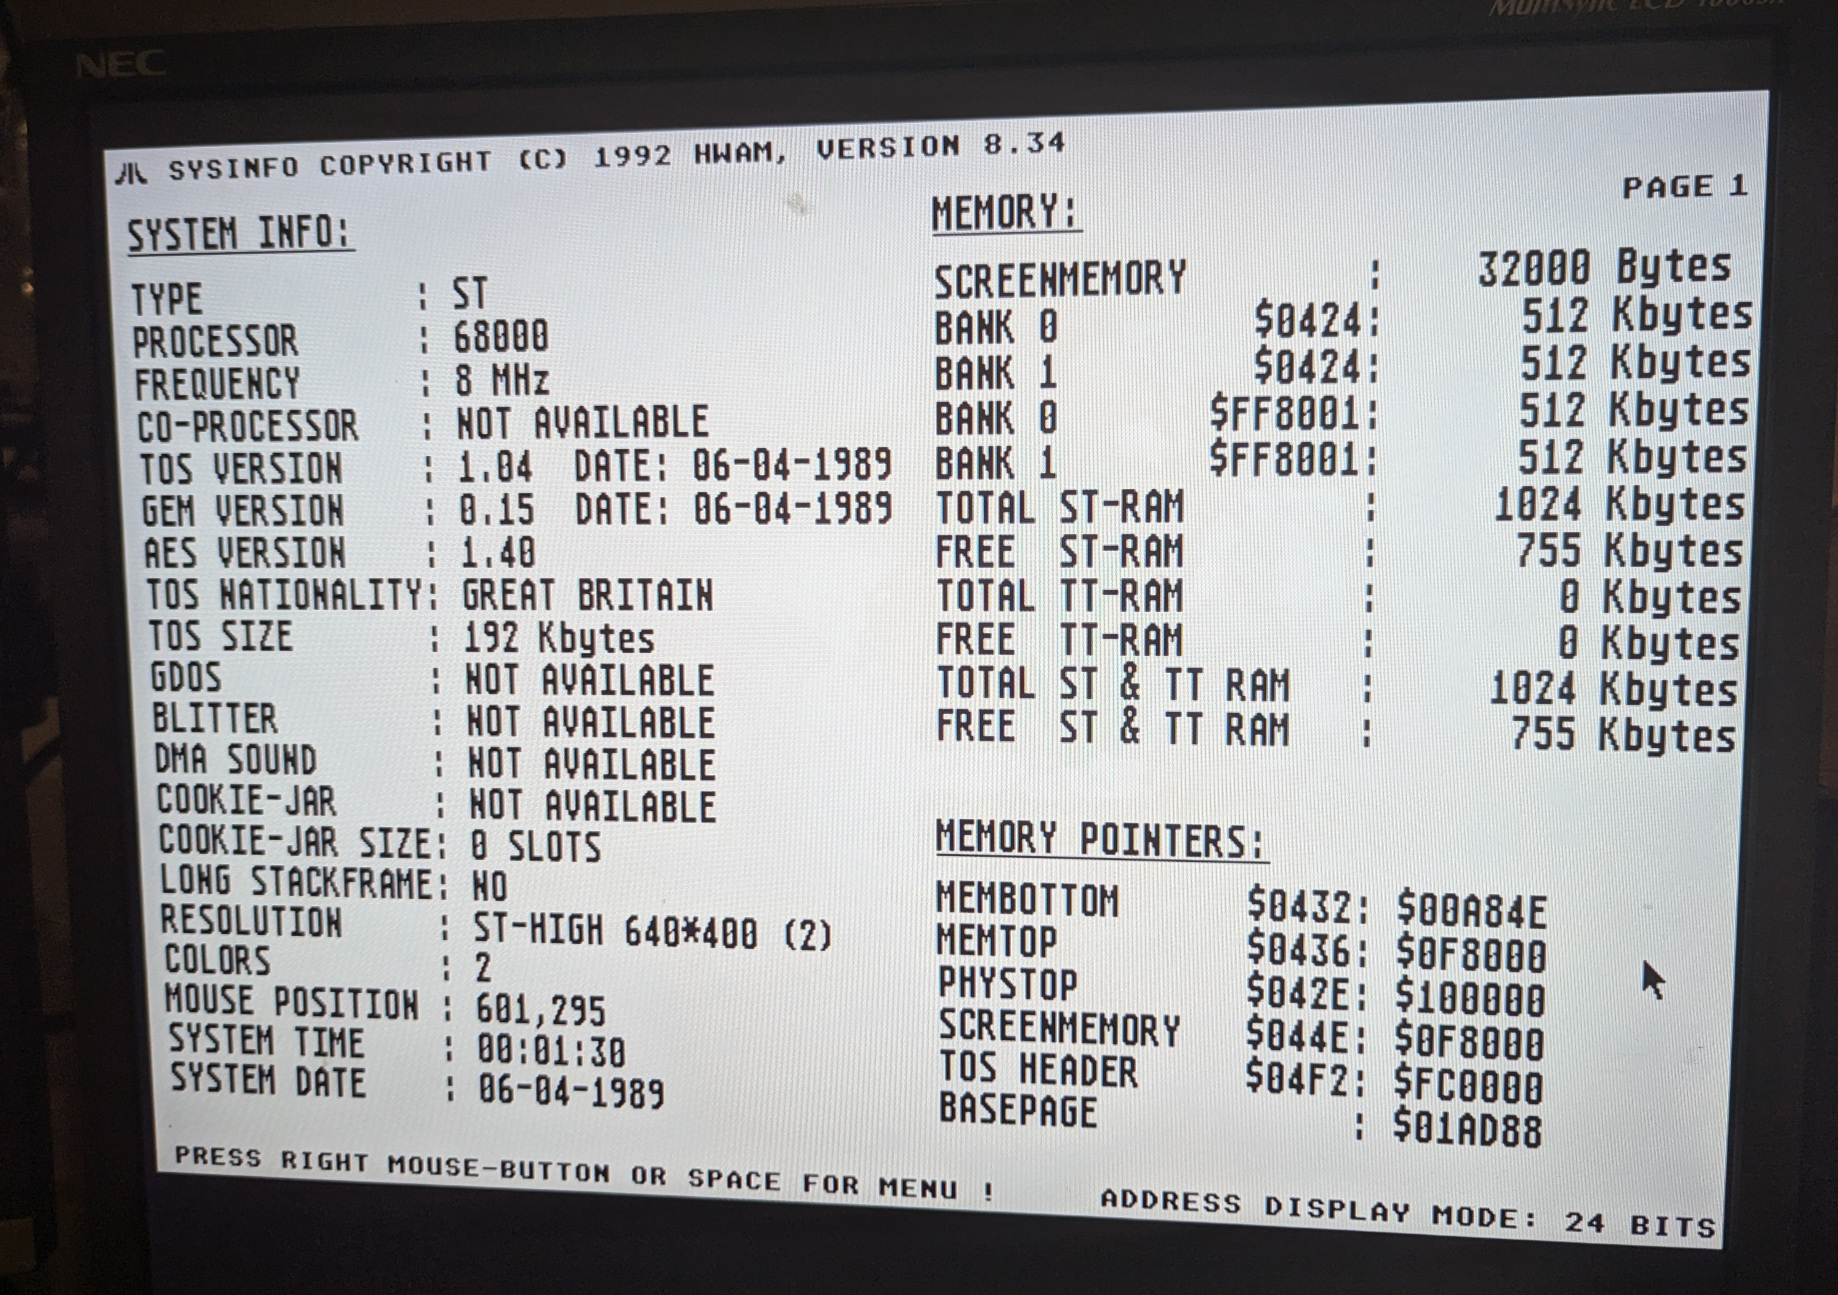
As expected the machine runs TOS 1.04, and I believe it to be quite an early model from some of my reading as it has red LEDs for both the power and the floppy drive, which look surpisingly cool to me as somebody who's always been used to the green/amber options on the ST line.
It's been an Atari heavy night as I've also been playing more with the SDrive-Max with one of my 8 bit machines, though that update will have to wait for tomorrow.
27/06/23
It's on my desk, not sure if video out works yet as my RGB cable needs repairing and the STF doesn't output composite/s-video over it's monitor port. Turns out it's not very grubby, but it is very yellowed. A brief test using an Atari diagnostic cart and serial cable showed the machine to be alive with good ROM/RAM.